To get started as a freelancer, go to sign up page and choose the freelancer option. Registration is free. Note that once chosen, a account type cannot be changed.

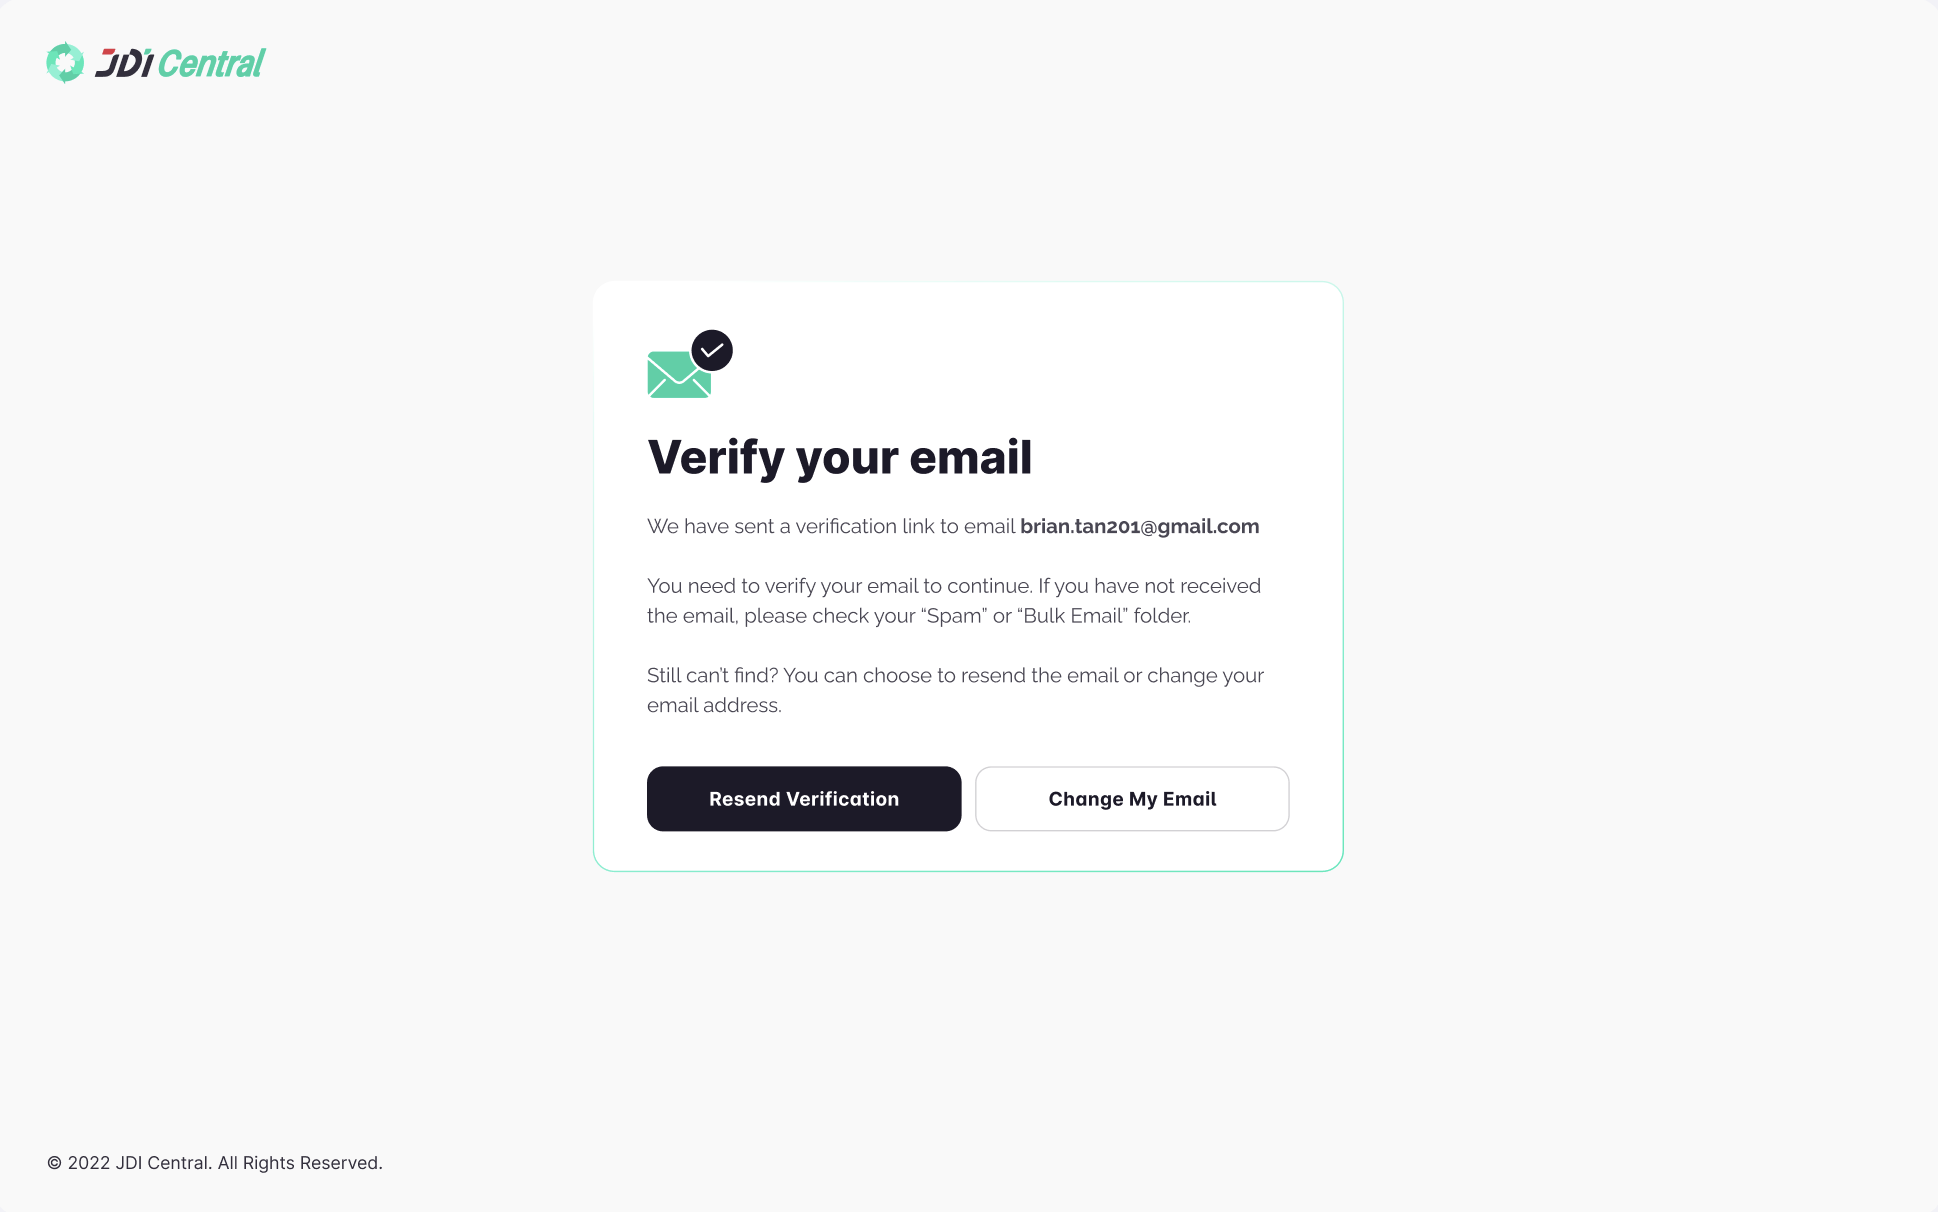
After registration, verify your email address, and complete onboarding flow. how many”. There is an option that allows you to change your registration email if any mistakes.
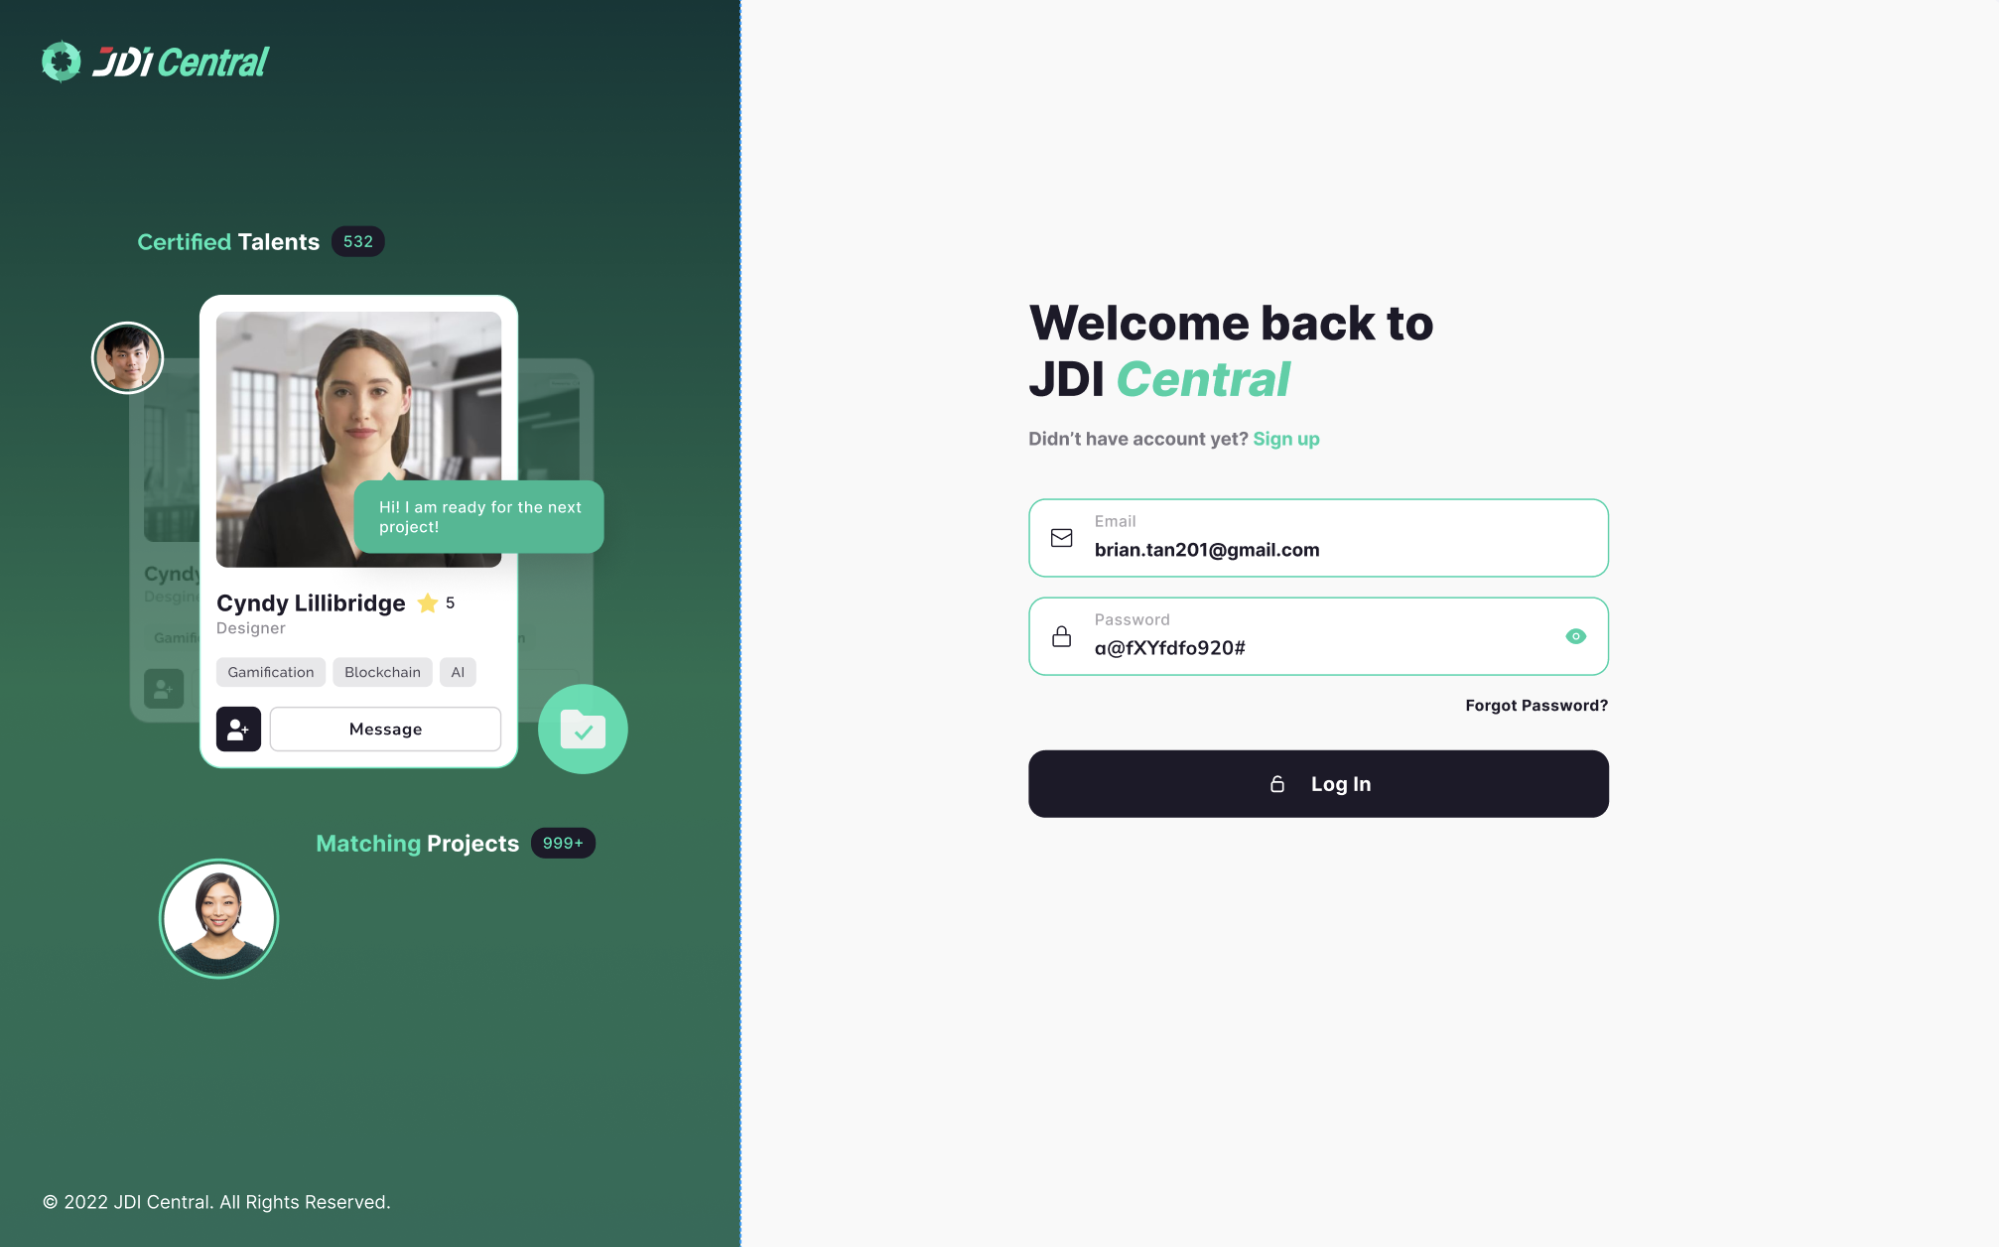
Enter your registered email and password, click Log in to join JDI Central.
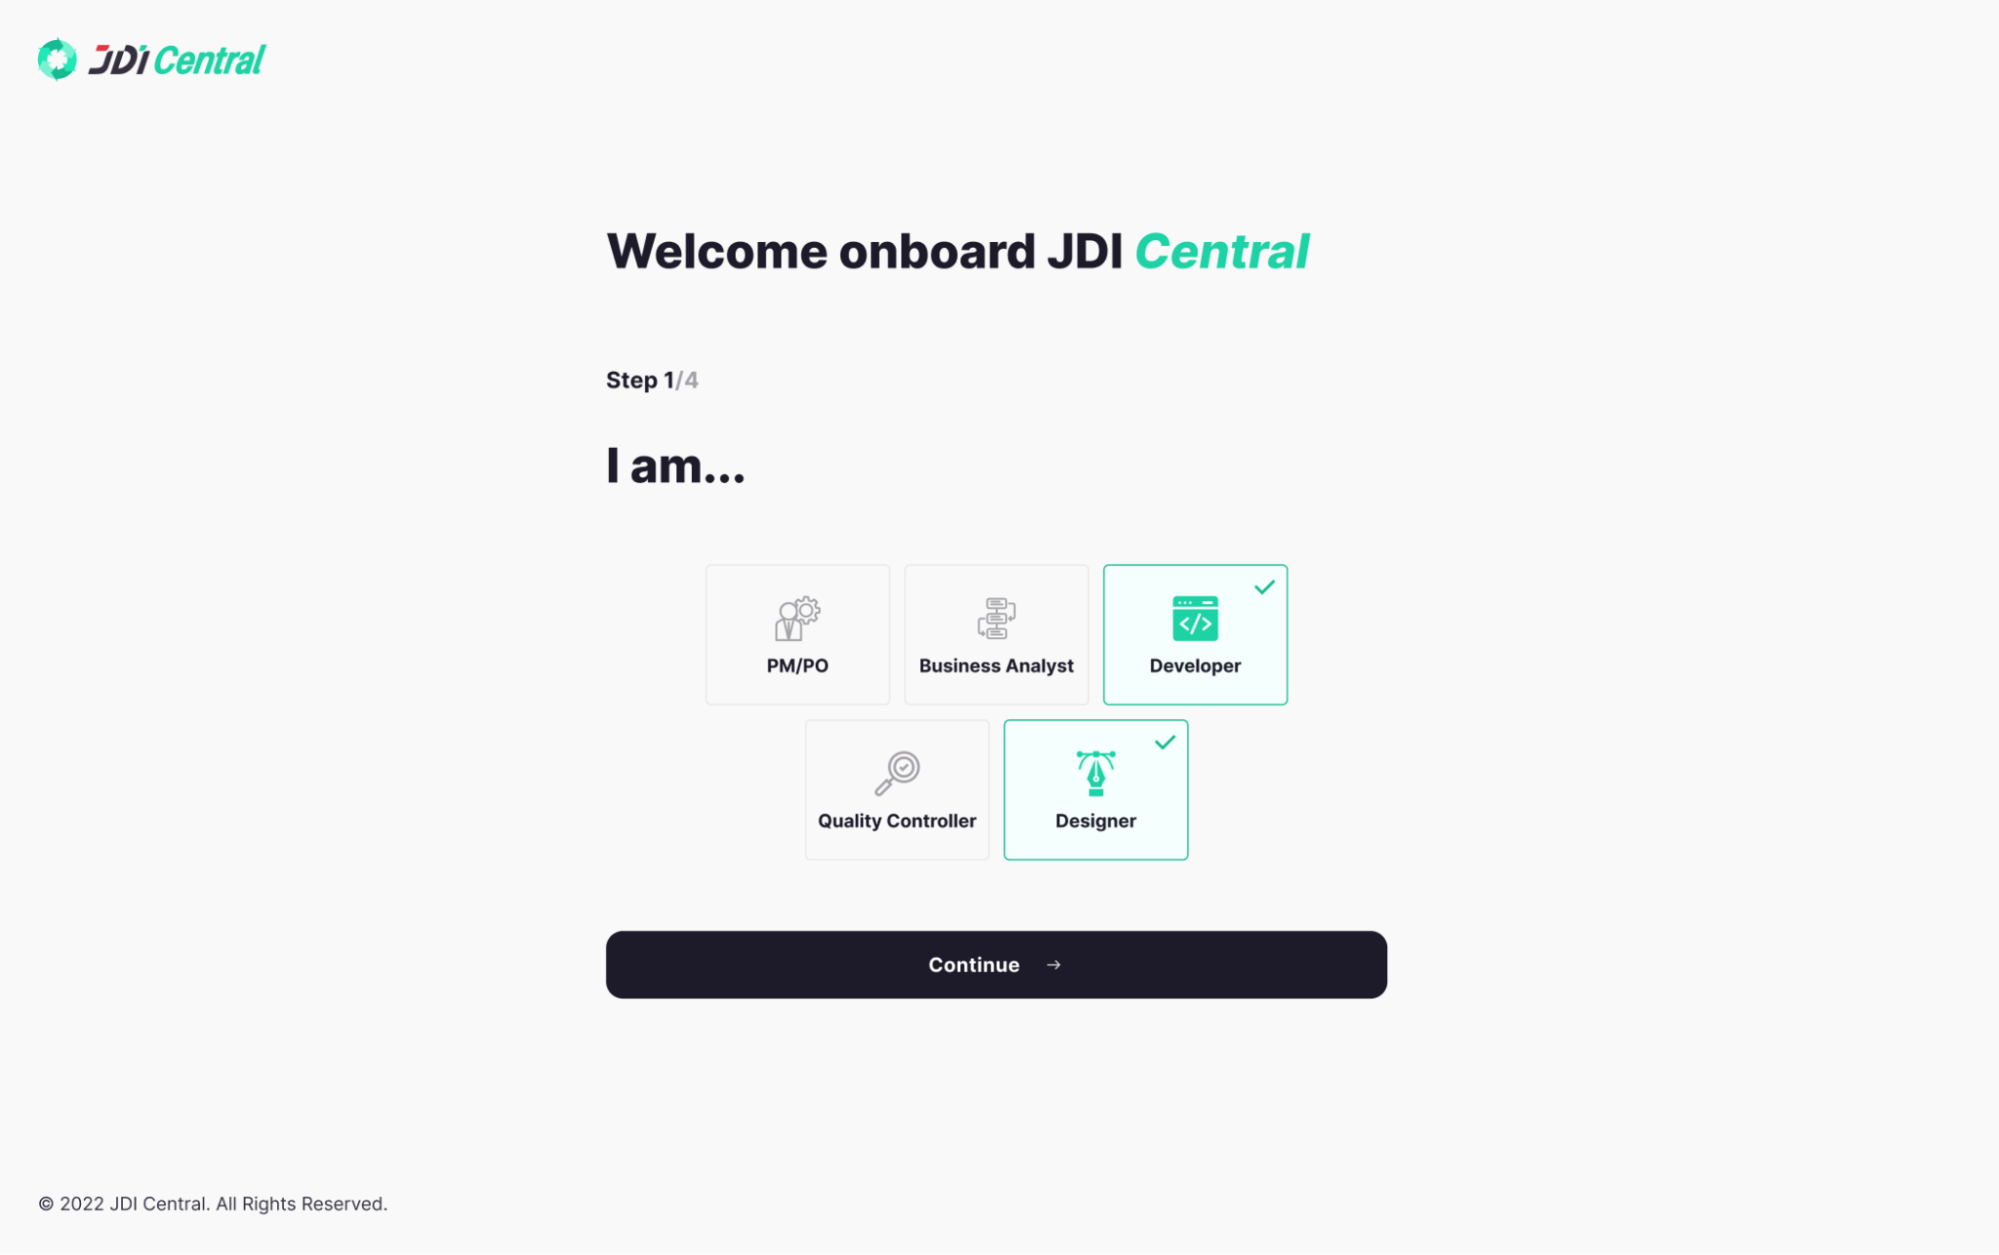
The first time log in you need to complete the onboarding steps to start exploring JDI Central
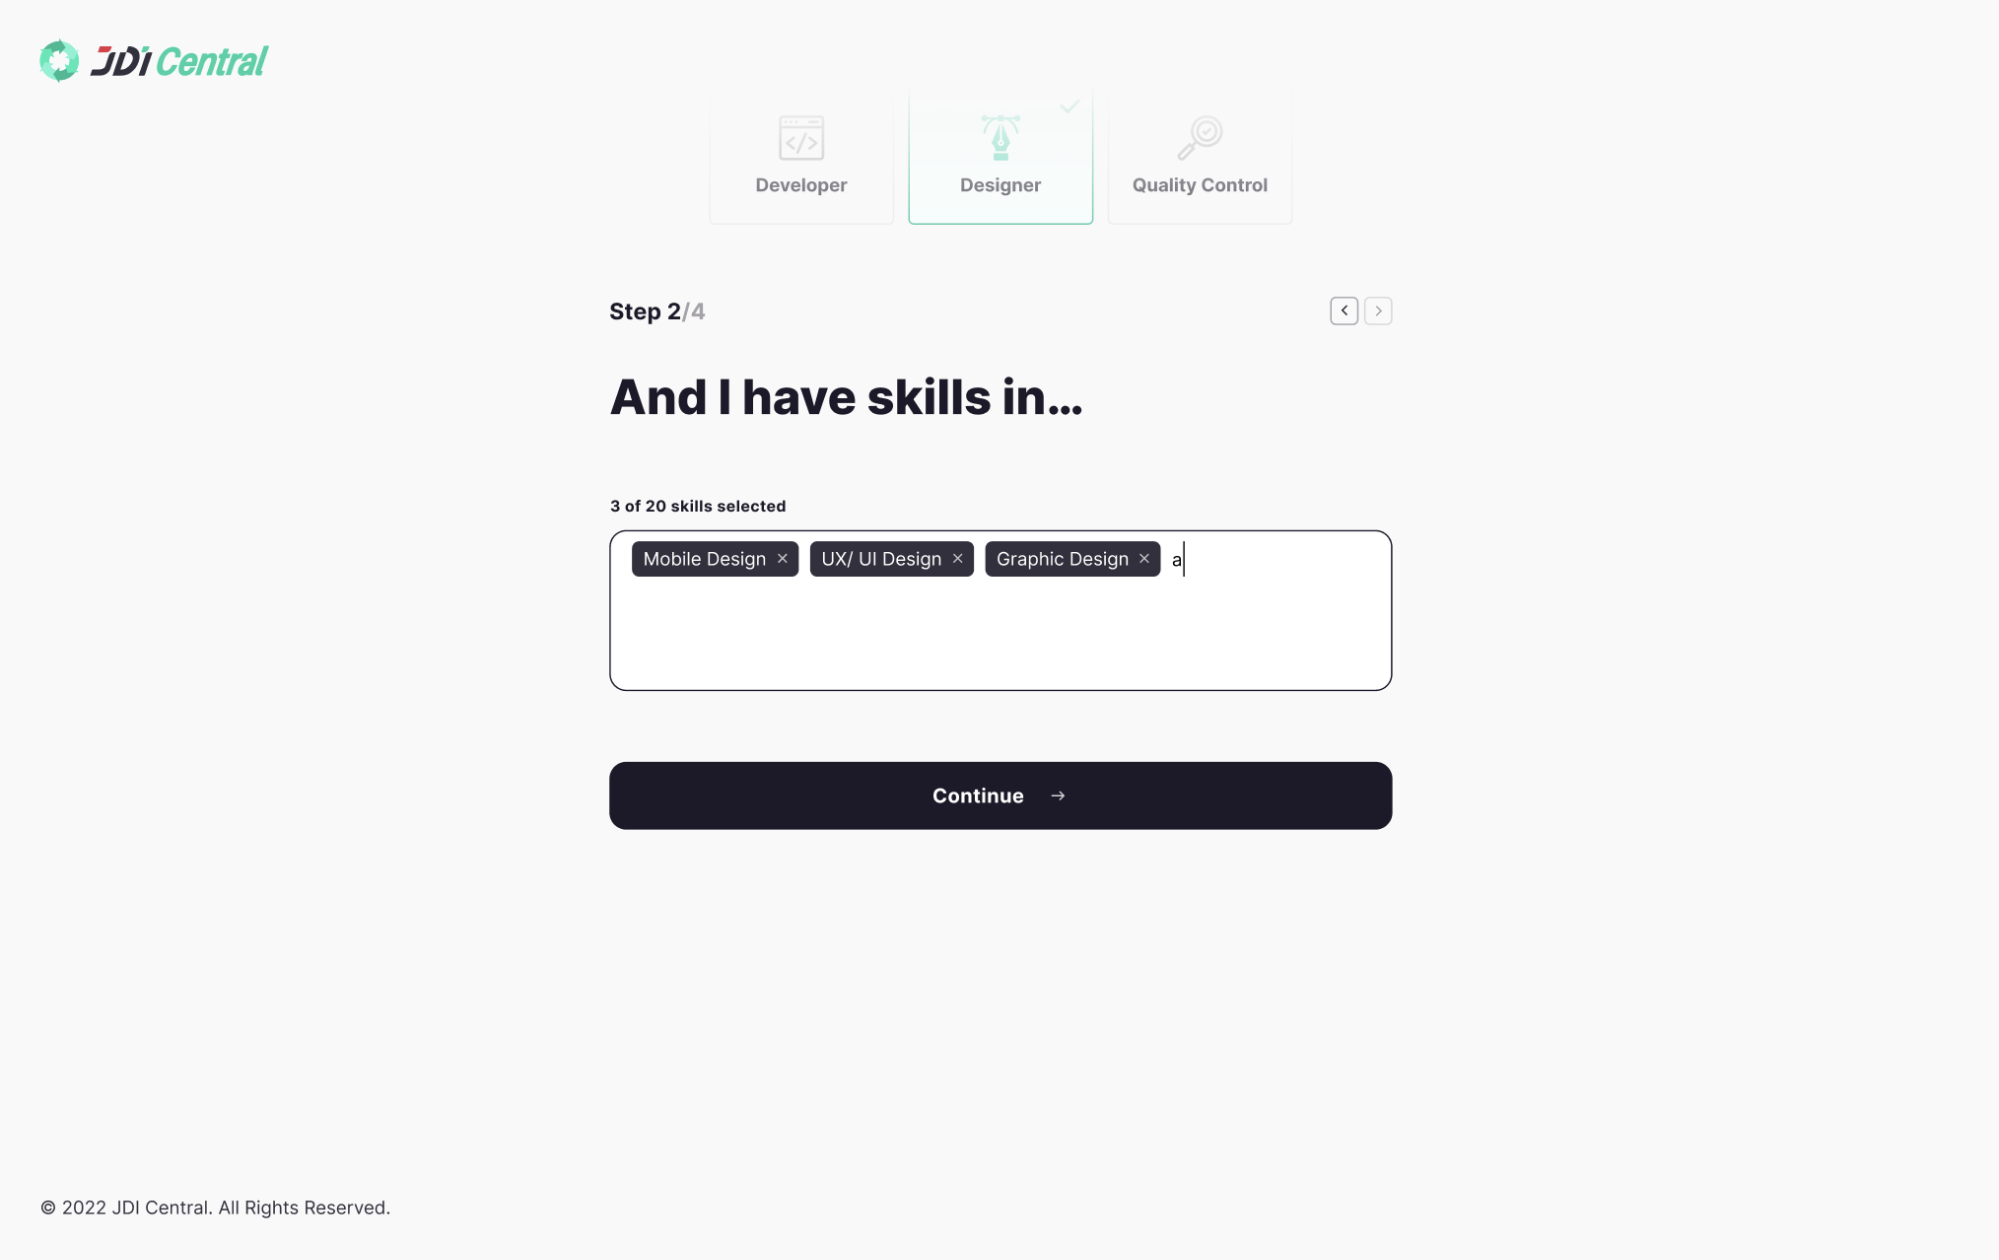
Start typing the name of a skill, then select the best match from the list provided
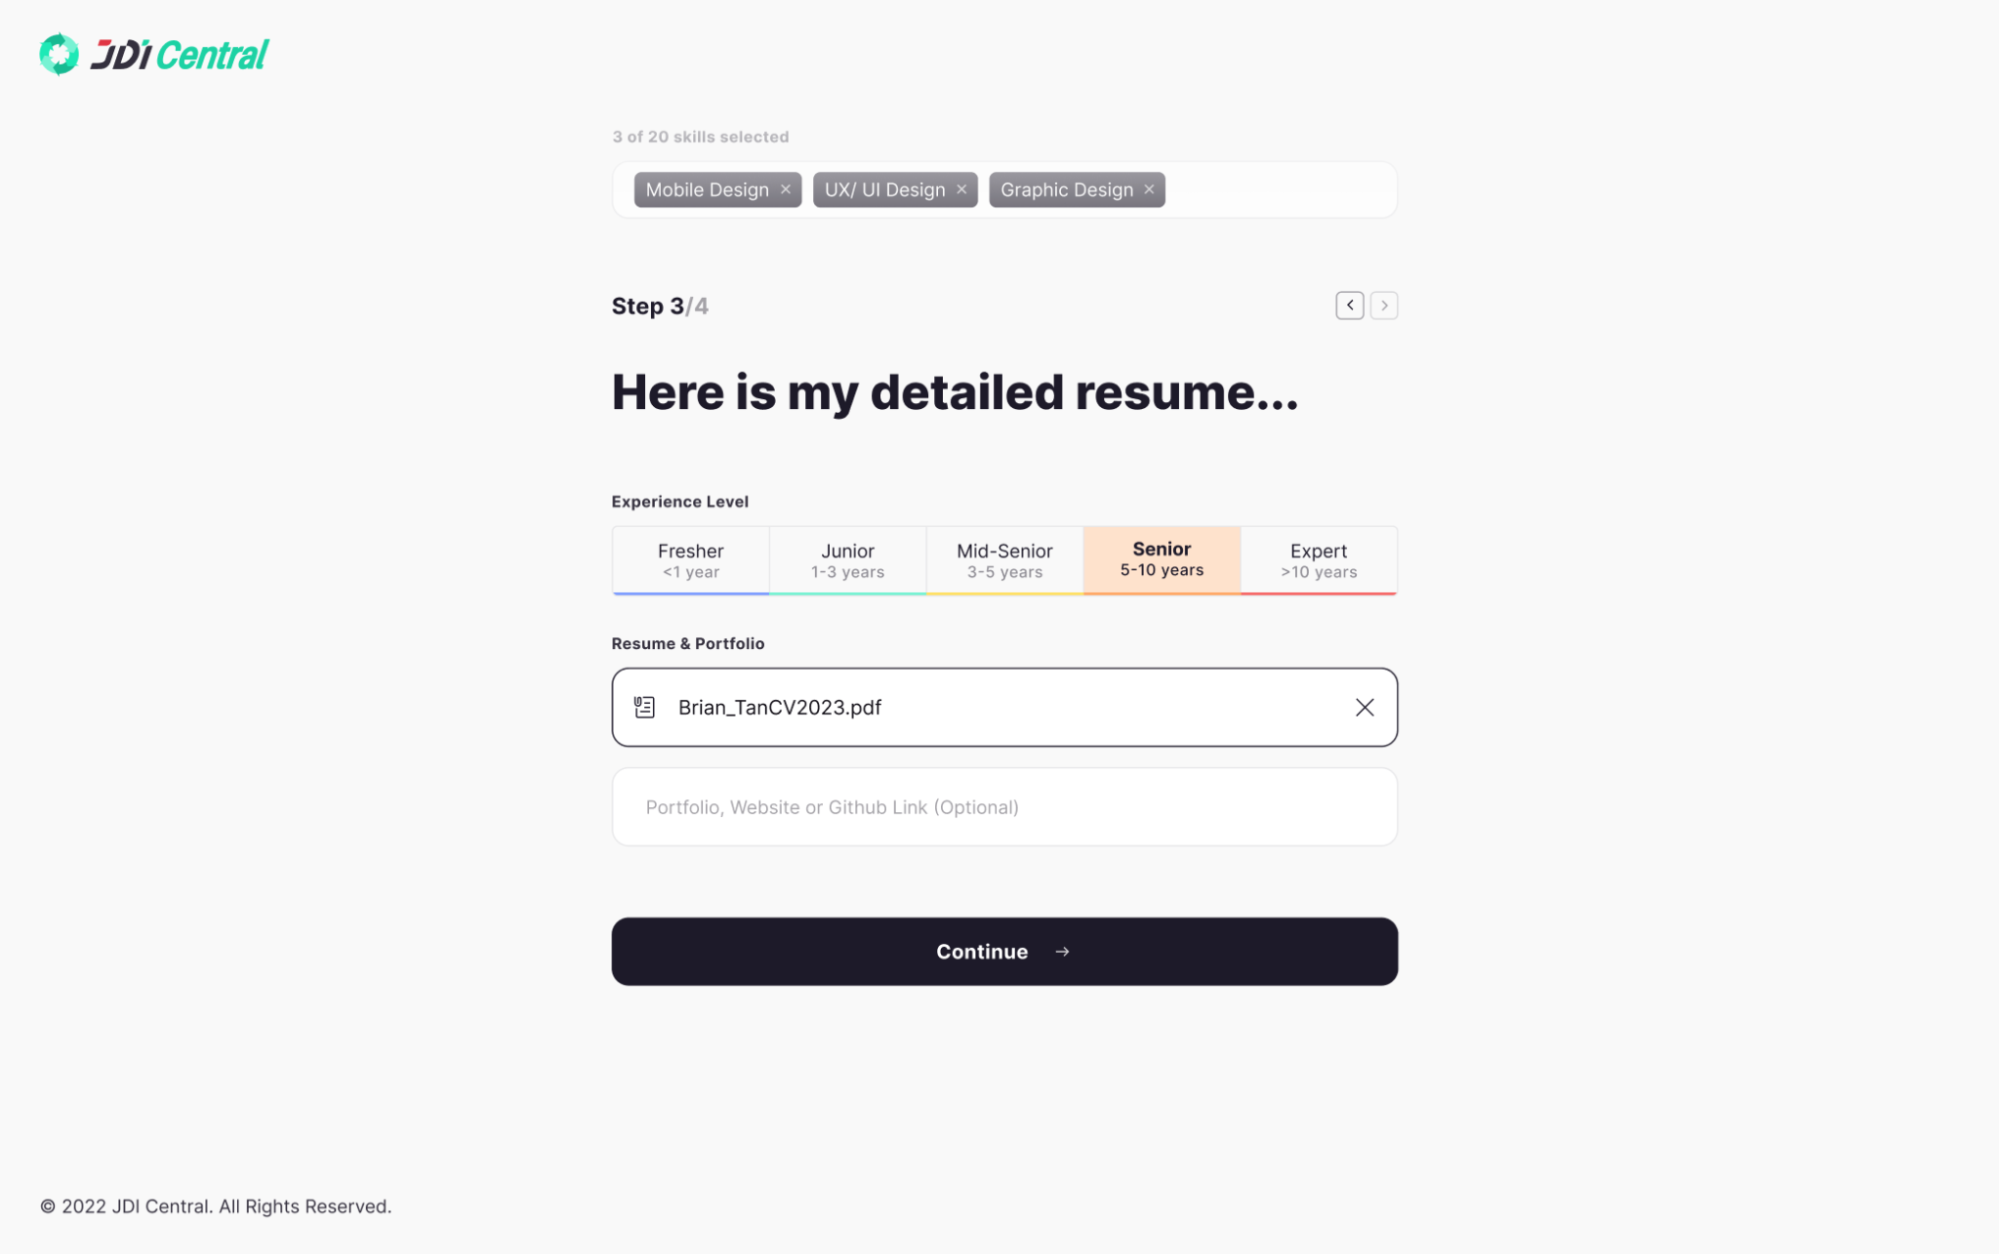
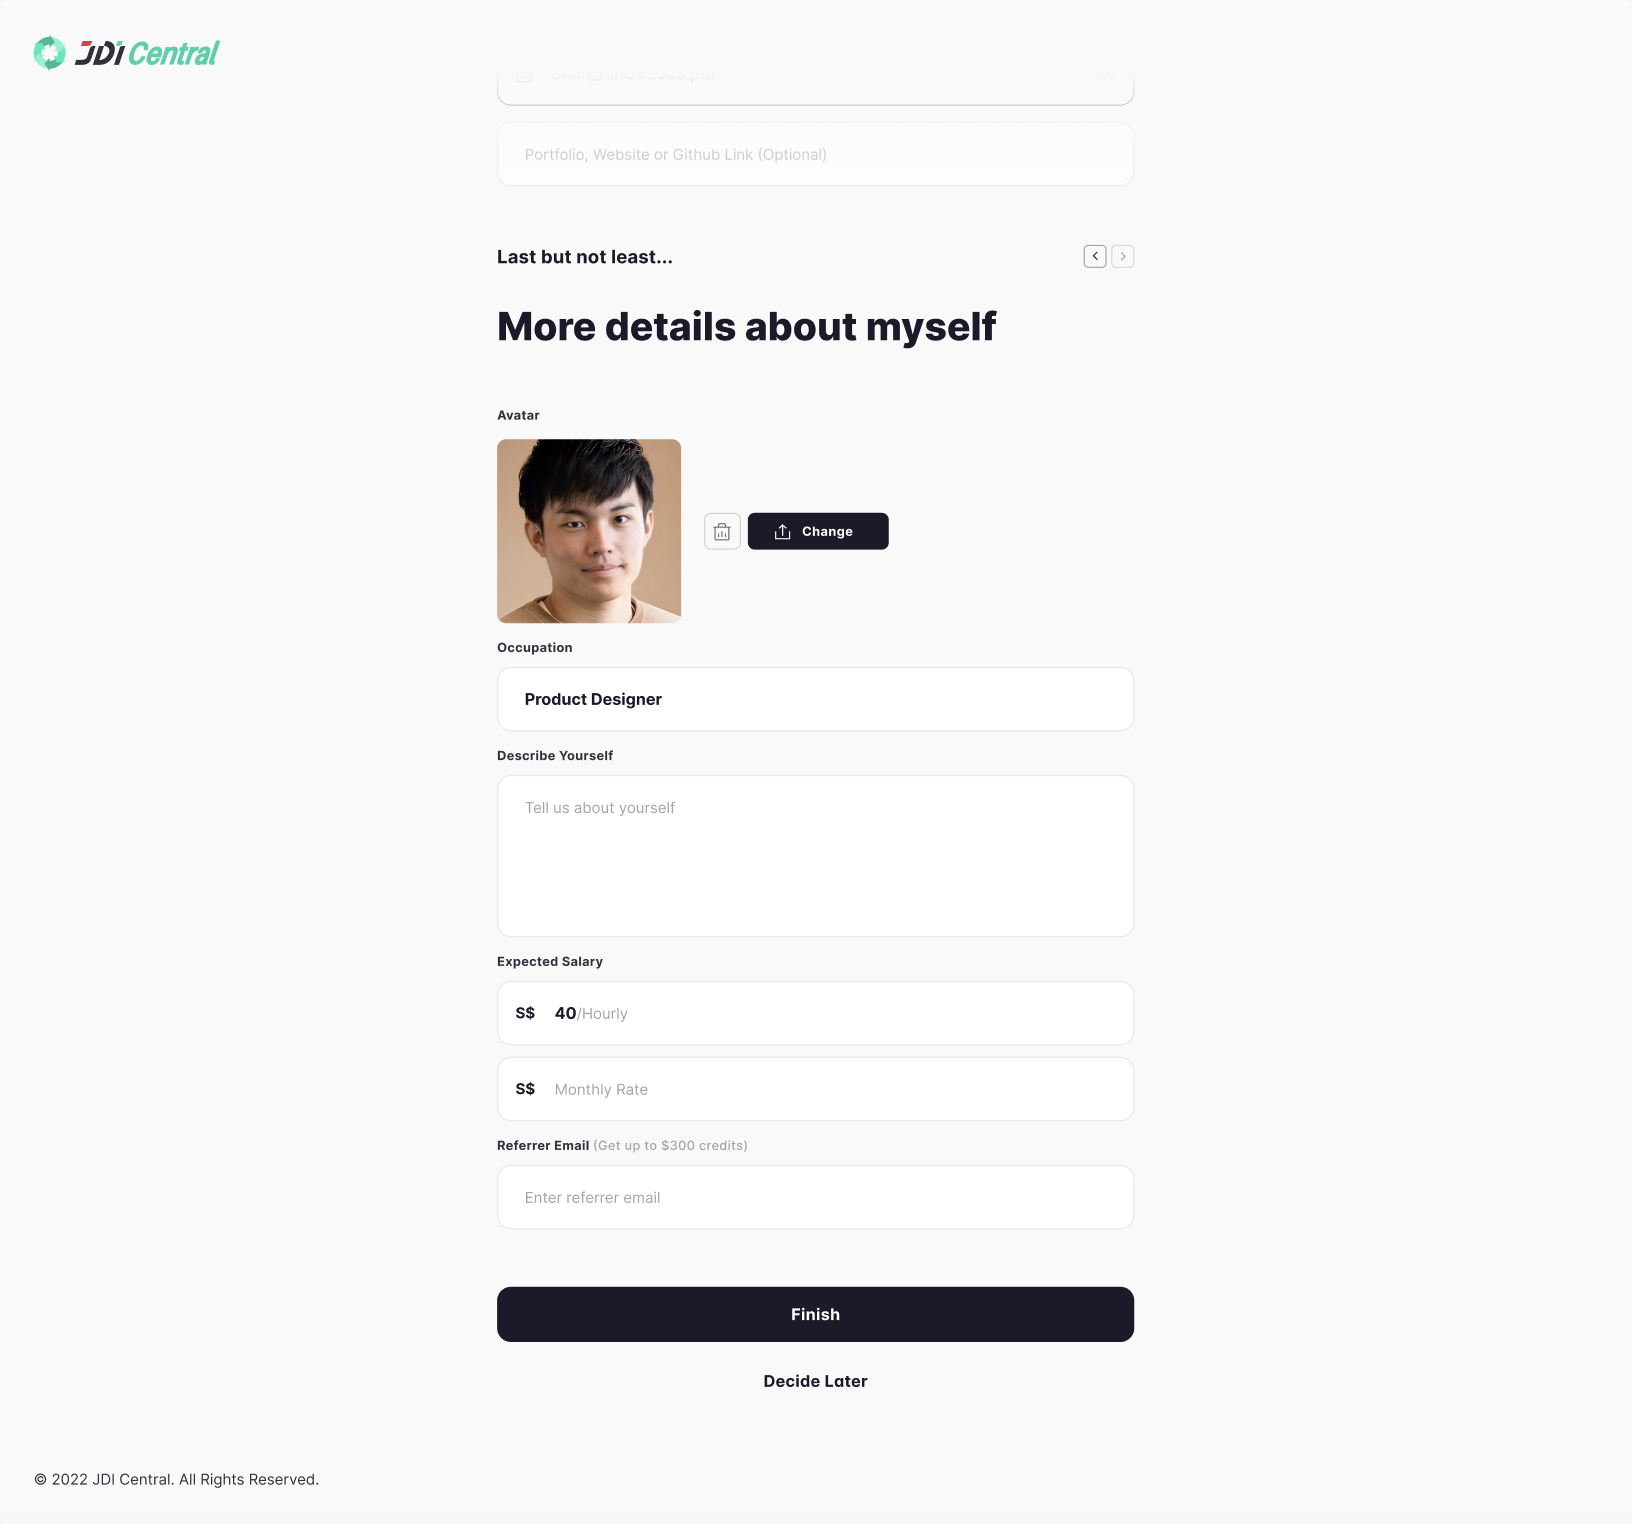
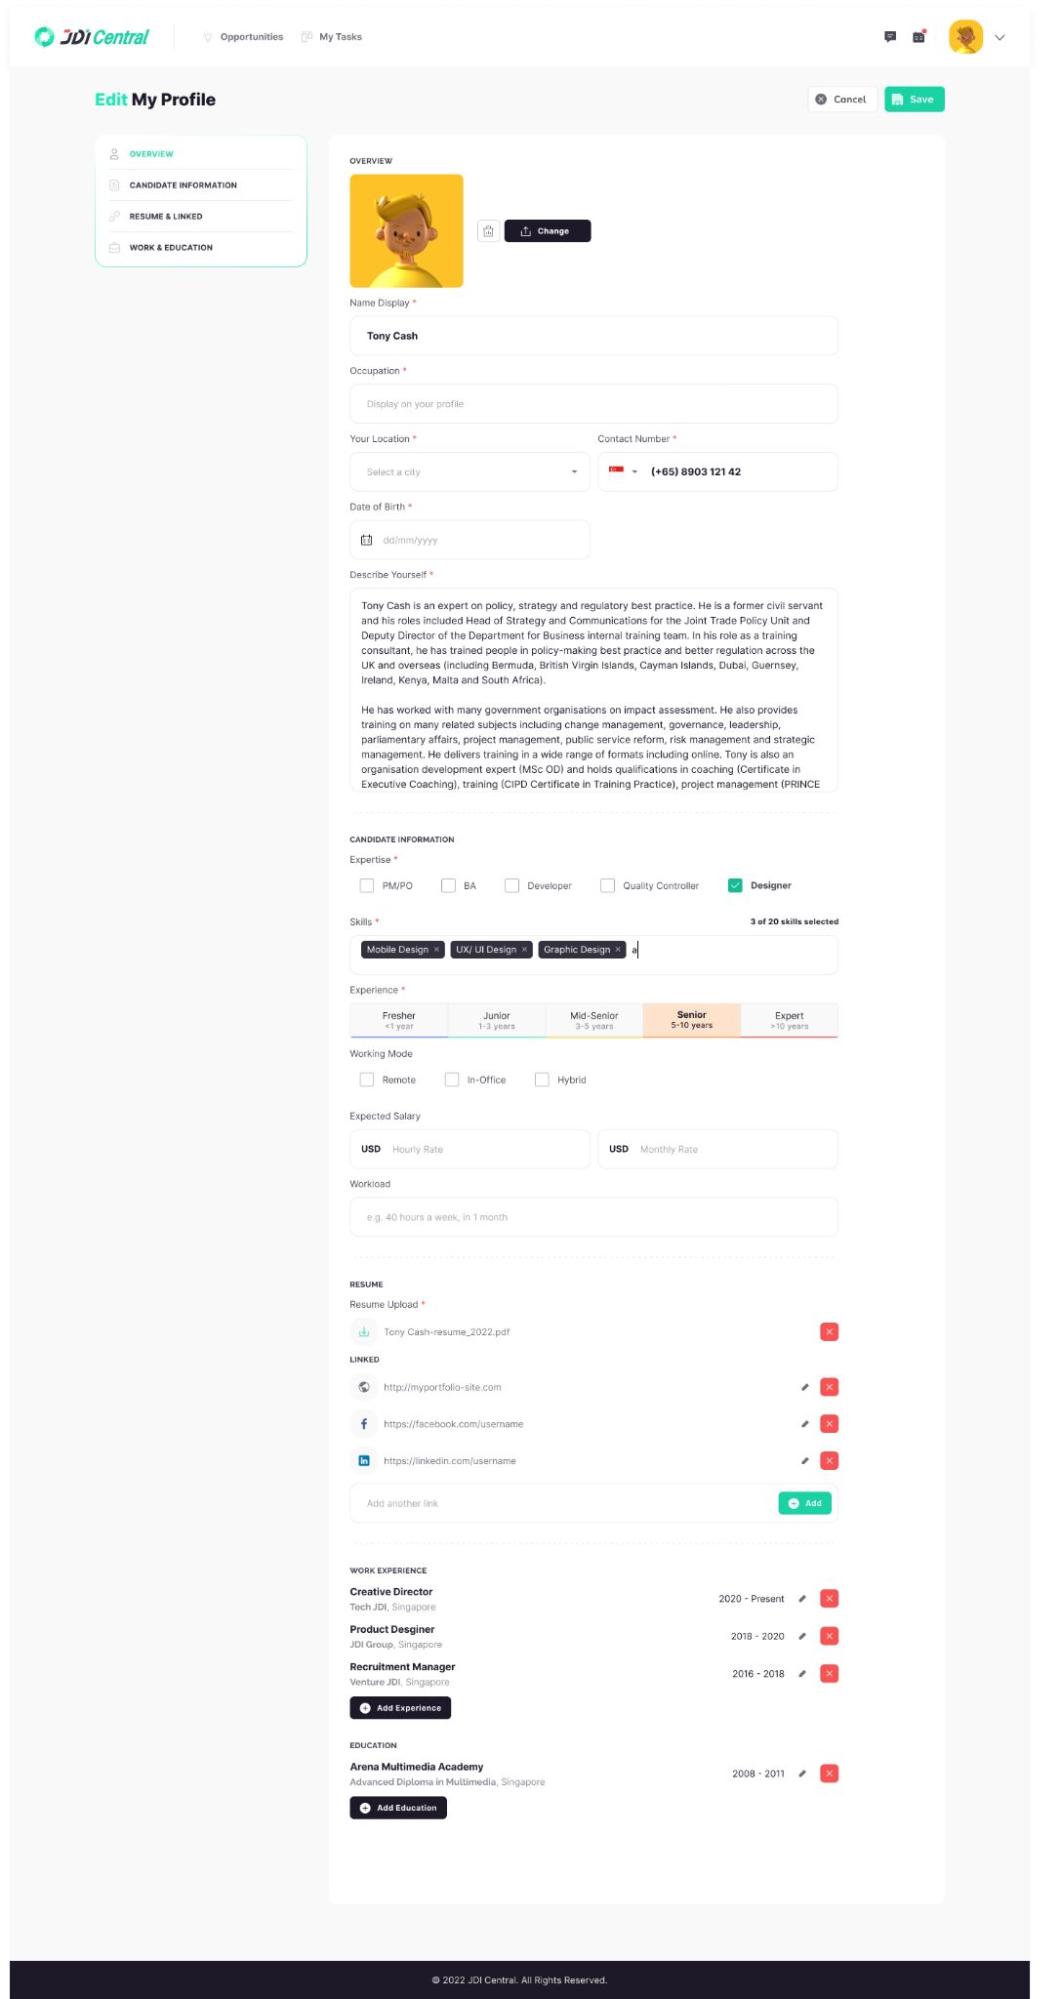
Required fields – Name
– Occupation
– Location, Contact Number
– Date of
Birth
– Describe Yourself
– Expertise (at least one)
– Skills (at least one)
–
Experience
– Resume Upload
Optional fields
-Profile Photo
-Working Mode
-Expected
Salary
-Workload
-Linked
-Work Experience
-Education
Navigate to: Opportunity page > Jobs list
Type a keyword search in the
box
Or filter:
Freelancer Type
Expertise
Year of experience
Working Mode
Salary
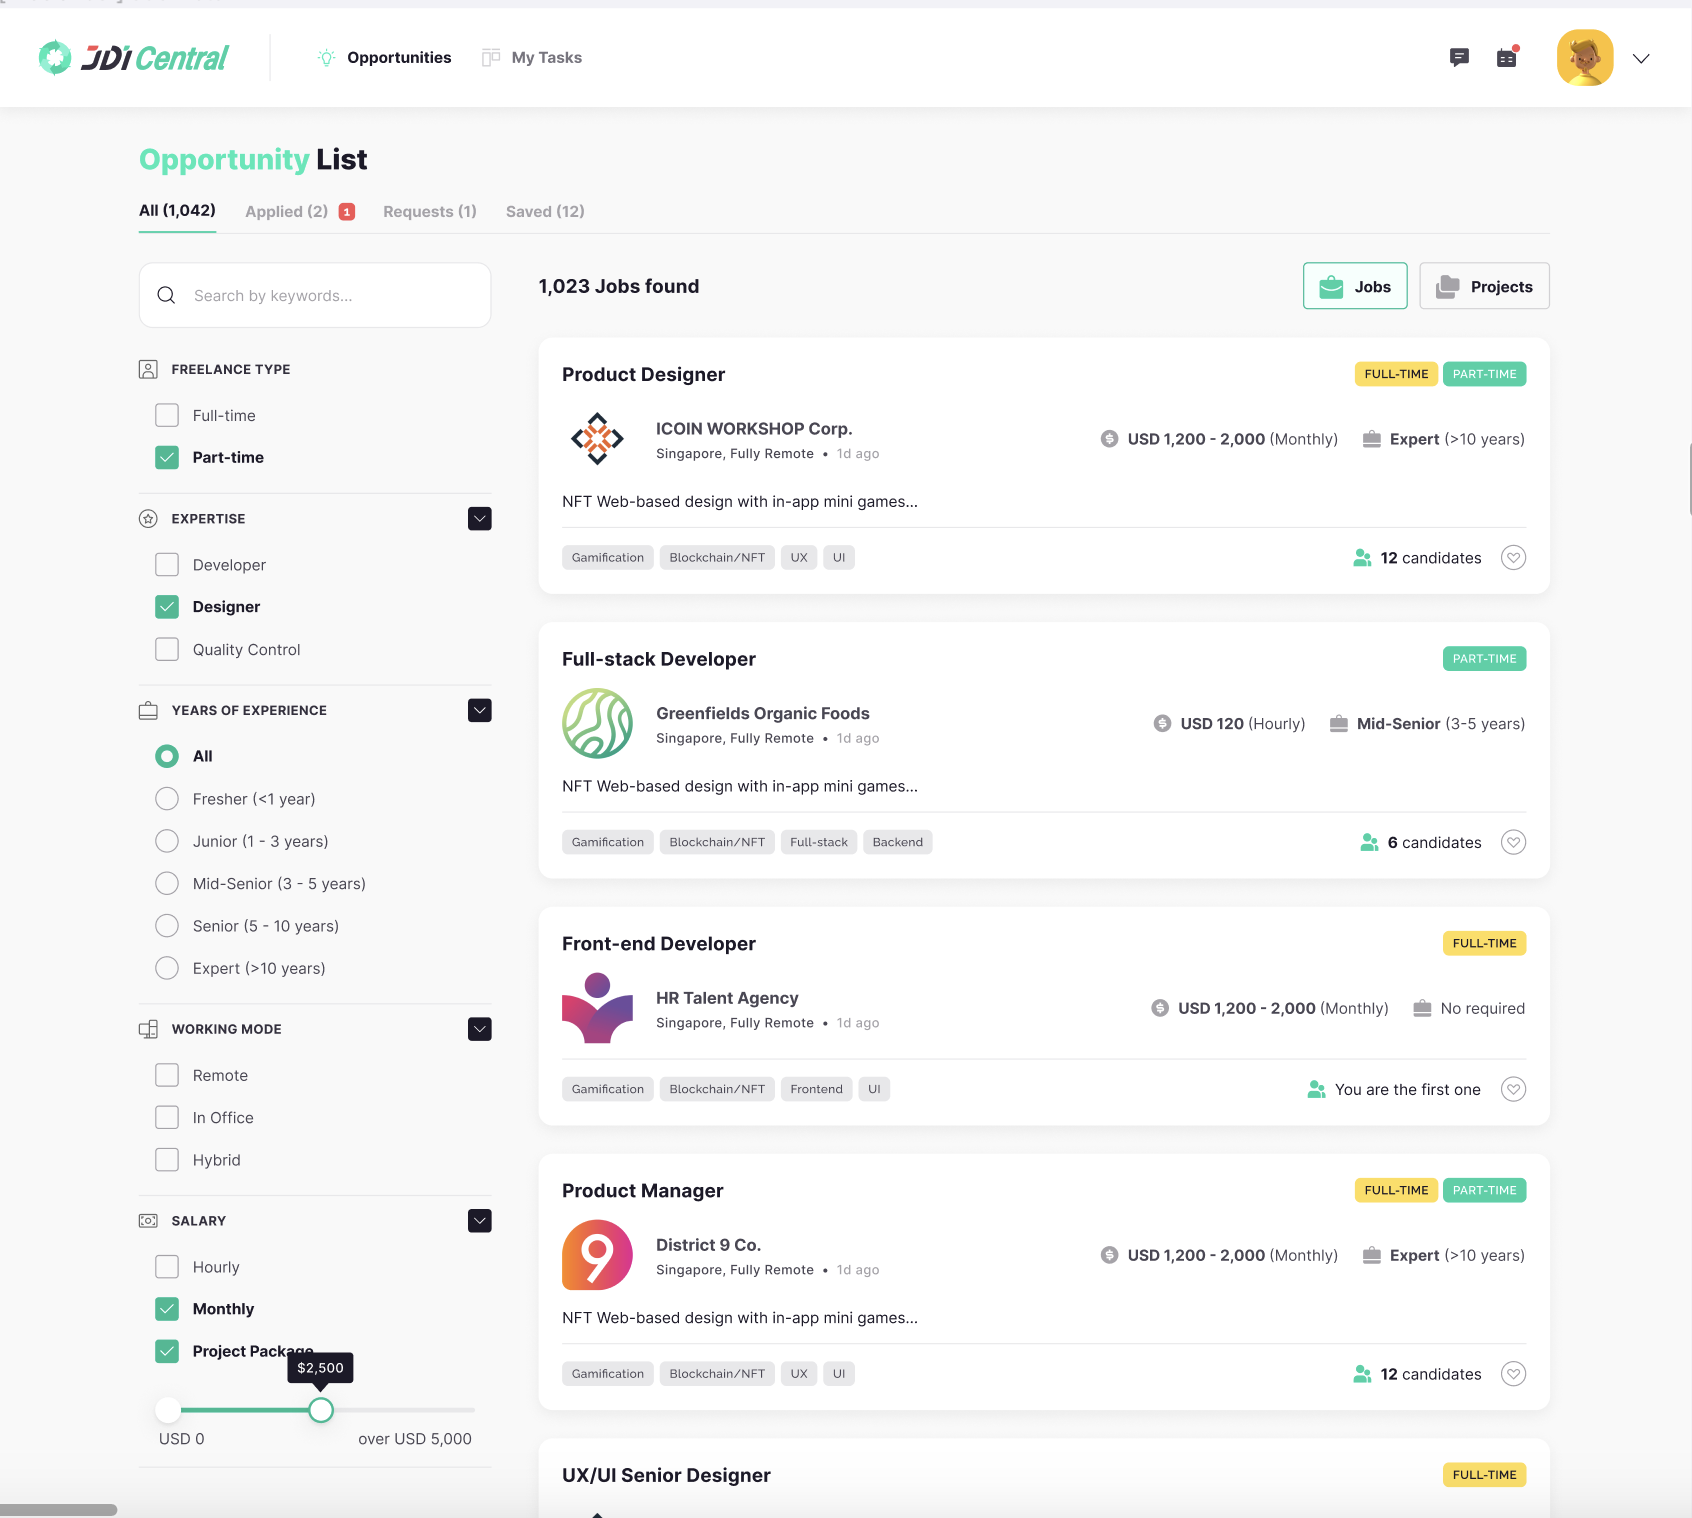
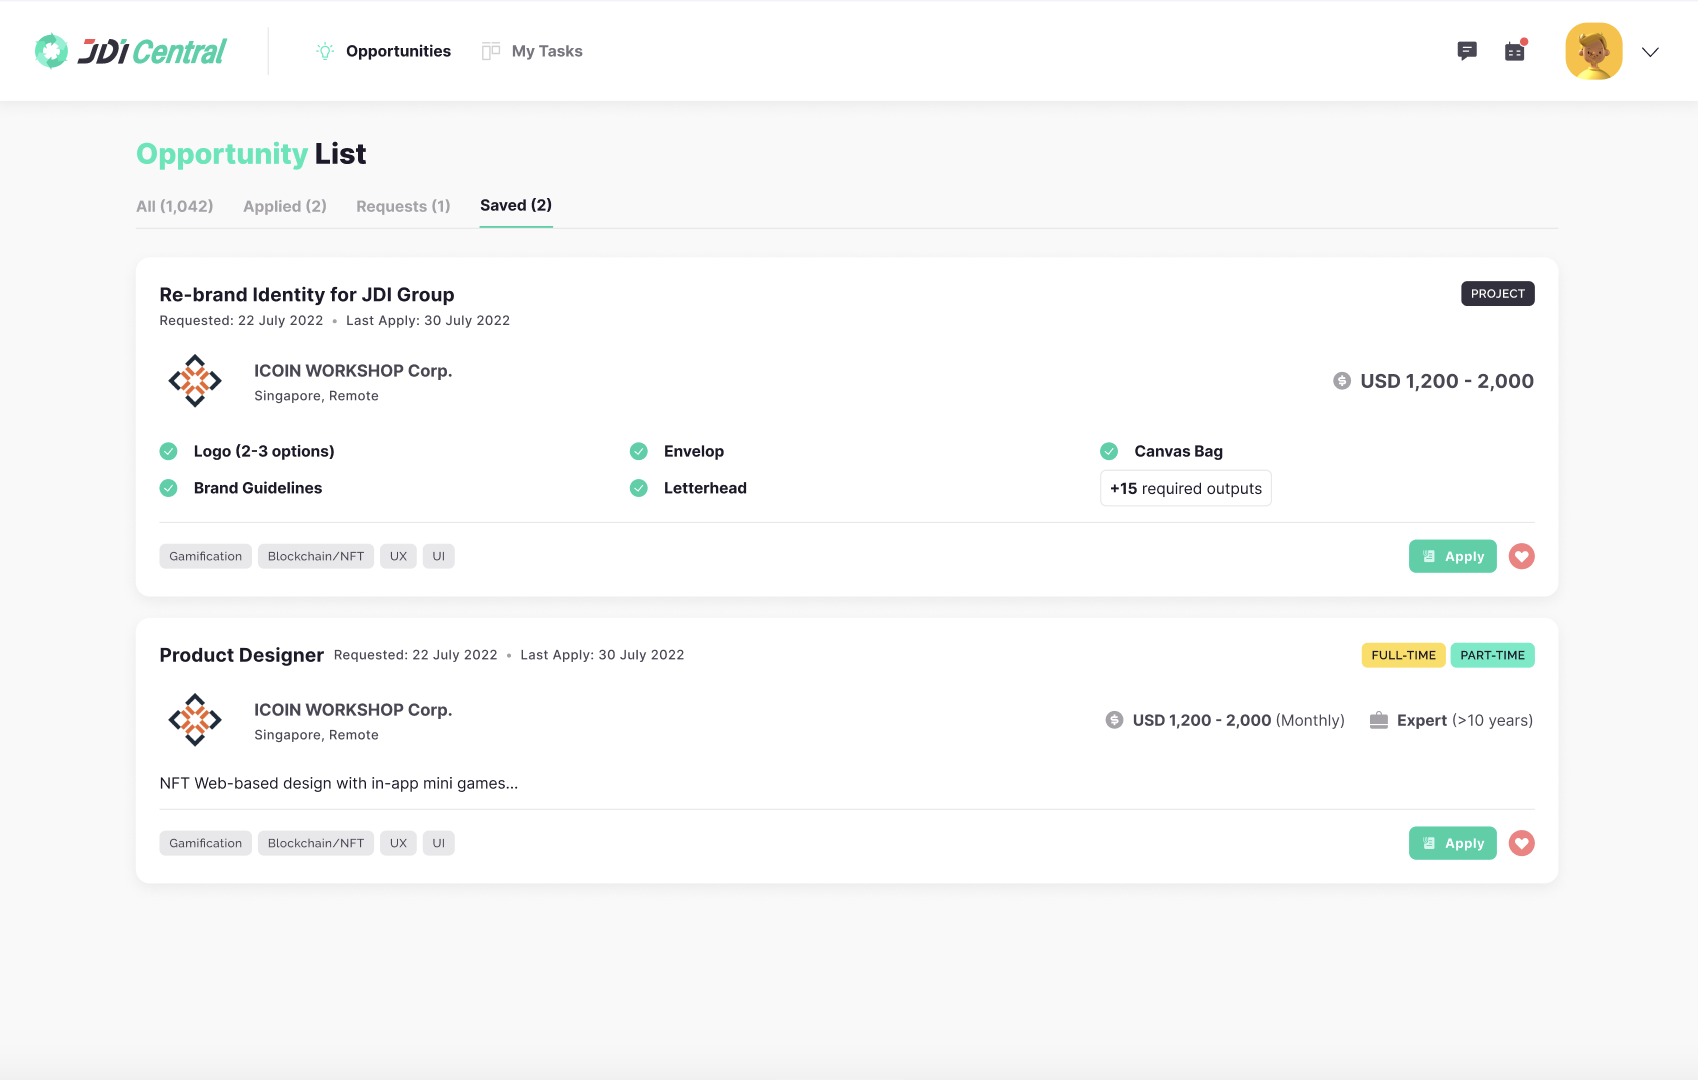
We know you don’t always have time right now to apply, so you can save a job and do
it later. Saving a job will add it to your saved jobs list.
1. Find a job you are interested in,
either from the Opportunity list home page or the Requested page
2.Click the heart button next to a
job, or the Save Job button in the job details
3.The job will be added to your Saved list
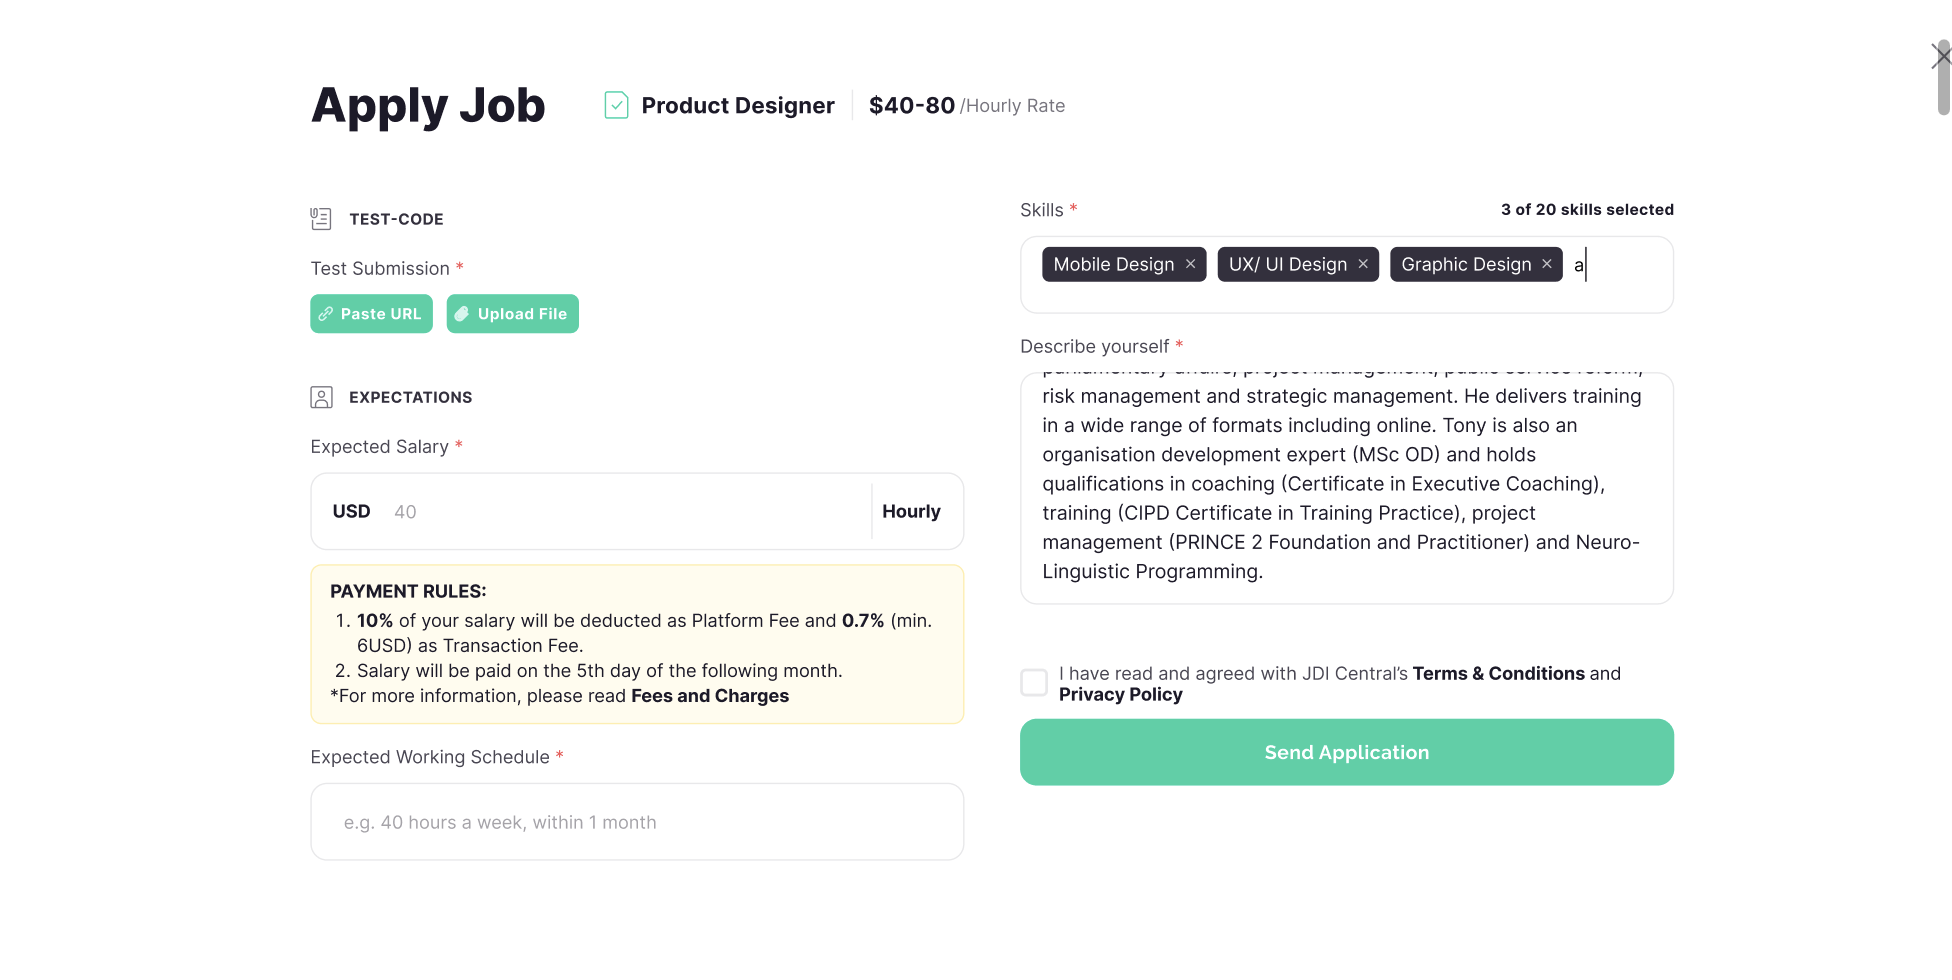
When you find a job you’re interested in, you can apply.
To apply for a job
Choose the Apply Now button on the job post page
•Enter your expected salary
•Read
Payment rules
•Enter your expected Working Schedule
•Edit your skills or Describe yourself
•Read and click agree with the Terms & Conditions and Privacy Policy
•Choose the Send
Application button
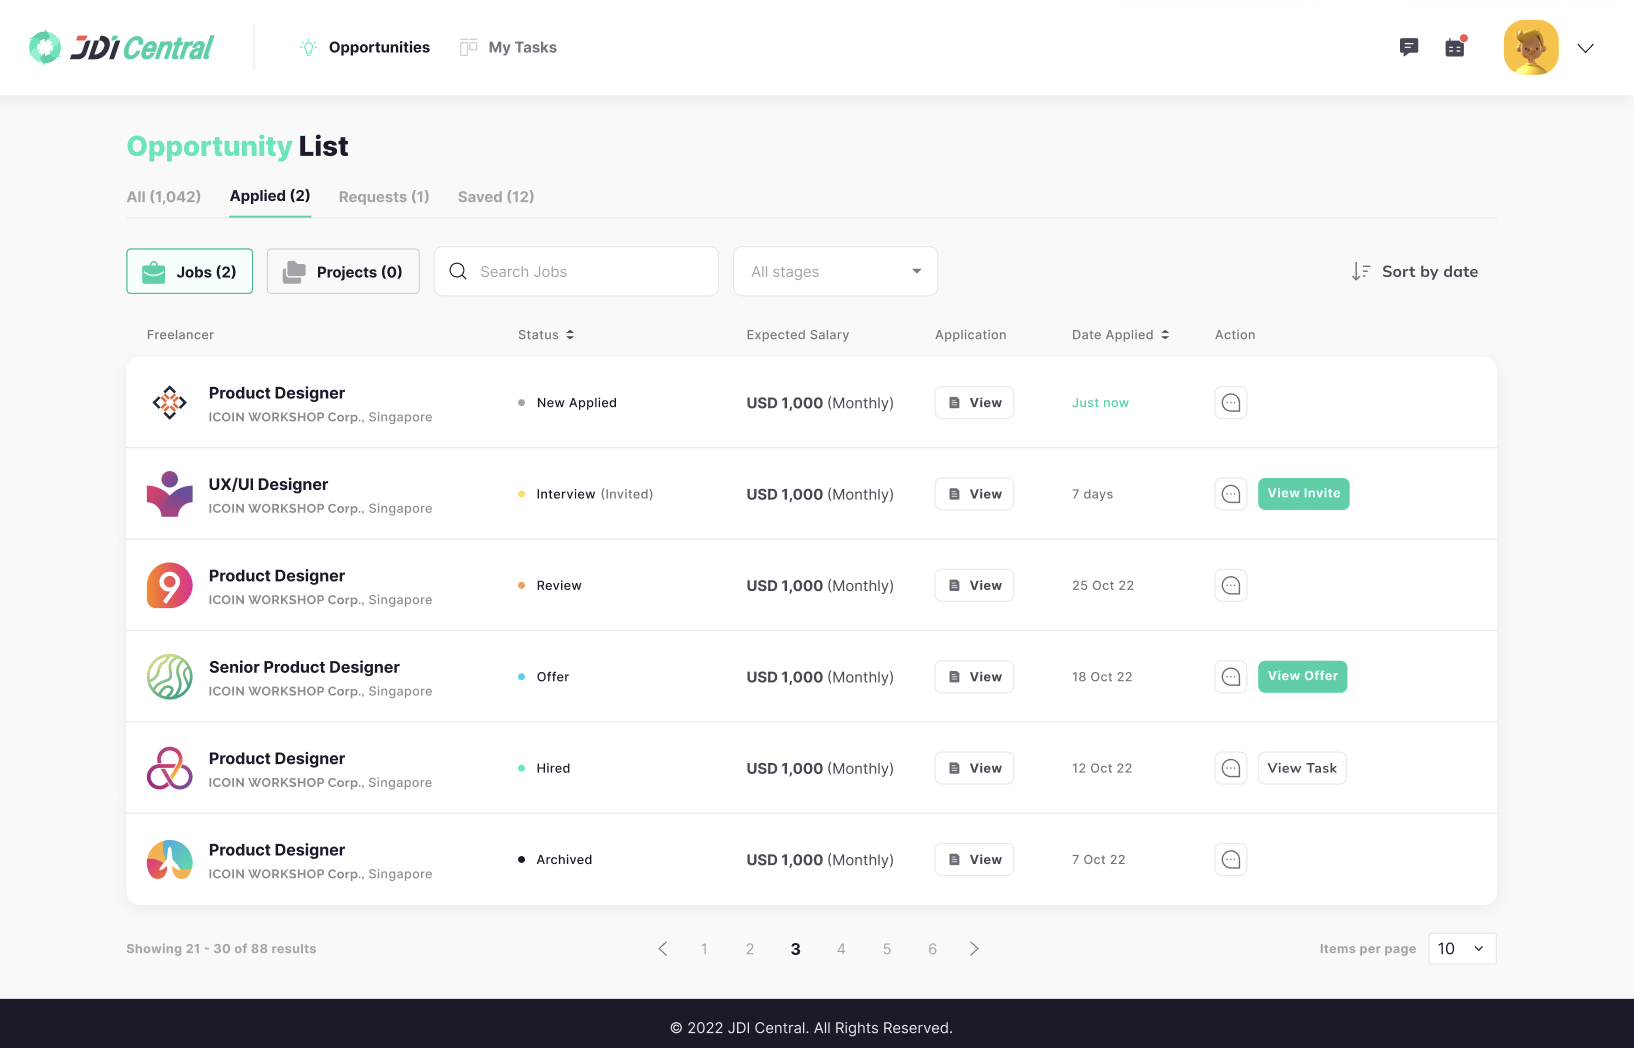
Navigate to Opportunity page > Click Applied list > Jobs list
-New
Apply: This is the initial status after you’ve successfully applied for a job. It signifies that the JDI
Talent Manager has received your application and it’s currently under review.
-Selected: Progressing
to this status means that the JDI Talent Manager has vetted and approved your application. It has now
been forwarded to the potential employer for further evaluation.
-Interview: This status is a
positive sign! It indicates that the potential employer is interested in your profile and has invited
you for an interview to discuss the job role in more detail.
-Review: This status means that
post-interview, the JDI Talent Manager is conducting a comprehensive review of your application to
determine the subsequent steps.
-Offer: An exciting milestone! The “Offer” status confirms that the
employer was impressed with your interview and credentials and has extended a formal job offer to
you.
-Hired: This status is a confirmation that you’ve been officially onboarded for the job.
Congratulations on your new role!
-Archived: This status is assigned if you’ve decided to decline an
interview invitation or a job offer. It helps in keeping track of opportunities that didn’t move
forward.
We’ve created several easy ways for you to search for projects that match your skills and interests. You can also save project posts that you are interested in, to apply later.
Navigate to Opportunity / Projects list
Type a basic keyword search in the
box
On the search results page, use the filters on the left to further narrow your results.
Trying
several search combinations and a variety of filters can help you find the project you’re looking for
more quickly. Some filter options include:
Working Mode
Project Bugde Range

1. Find a job you are interested in, either from the Opportunity list home page
or the Requested page
2. Click the heart button next to a job, or the Save Job button in the job
details
3. The job will be added to your Saved list
When you find a project you’re interested in, you can submit a proposal. Proposals
are a great opportunity to introduce yourself to a potential client and show off some of your skills and
experience.
This is also a good time to highlight how your expertise aligns with the client’s project
and to suggest a next step
To submit a proposal
Choose the Submit Proposal button on the job
post page
– Enter your expected cost
– Read Payment rules
– Enter your Estimated Completion
Time
– Answer What experiences and skills do you have that would be suitable for this project?
–
Answer How do you plan to do this project?
– Upload Proposal file
– Read and click agree with the
Terms & Conditions and Privacy Policy
– Choose the Send Application button
Navigate to The Opportunity page > Click Applied list > Projects List
–
New Apply: This status appears immediately after you’ve successfully applied for a project. It indicates
that the JDI Talent Manager has received your application and is in the process of hiring it.
–
Selected: Your application has progressed to the next stage! The “Selected” status means that the JDI
Talent Manager has reviewed and approved your application, forwarding it to the potential employer for
further consideration.
– Interview: If you see this status, it’s time to prepare for an interview.
The potential employer has taken an interest in your profile and has extended an invitation for you to
discuss the project in detail.
– Review: At this stage, the JDI Talent Manager is conducting a
thorough review of your application, post-interview, to determine the next steps.
– Offer: Great
news! The “Offer” status means that the employer was impressed with your skills and background and has
extended a formal project offer to you.
– Hired: This status confirms that you’ve been officially
hired for the project. Congratulations!
– Archived: This status appears if you’ve declined an
interview invitation or a project offer. It’s a way to keep track of opportunities that didn’t progress
for future reference.
– Navigate to Task list > click on a task detail > click Submit Payment Request
button
– Enter valid information > click the Send Request button
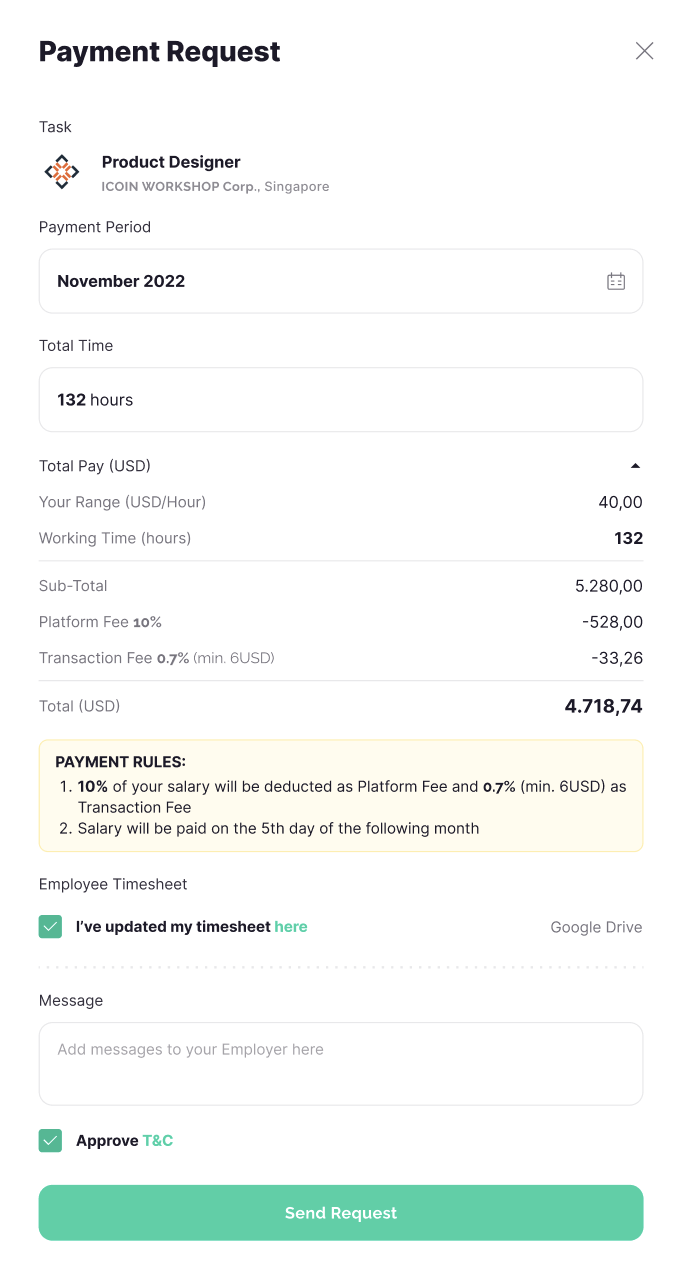
Navigate to the Task page
– Requested: This status appears after you’ve
submitted a payment request for a task. It indicates that your request is pending and awaiting the
Employer’s approval.
– Approved: This status confirms that the Employer has reviewed and approved
your payment request. The request is now in the queue for JDI’s processing.
– Paid: This status
signifies that JDI Central has processed the payment for your task. The funds have been released, but
you may not have received them yet.
– Received: This is the final status in the payment process. It
confirms that you, the freelancer, have successfully received the payment for the task.
– Declined:
This status indicates that there was an issue with your payment request, and it was declined by either
the Employer or JDI Central. You’ll need to review and resubmit your payment request.

ALL ARTICLES
© 2022 JDI Central. All Rights Reserved.